Setting up your first game server
Welcome to XGamingServer! This comprehensive guide will walk you through everything you need to know to get your first game server up and running. Whether you’re hosting for friends or building a community, we’ll help you get started quickly and efficiently.What You’ll Learn
- How to choose the right game and server configuration
- Step-by-step server setup process
- Essential server management basics
- How to connect and invite players
- Common troubleshooting tips
Step 1: Choose Your Game
Head to xgamingserver.com and select Create a Server. We support a wide variety of popular games, each optimized for the best hosting experience:Popular Games We Support
Survival & Sandbox Games:- Minecraft - The classic block-building game
- Palworld - Creature collection and survival
- Valheim - Viking survival adventure
- Rust - Hardcore survival multiplayer
- 7 Days to Die - Zombie survival crafting
- Satisfactory - First-person factory building
- Factorio - Automation and factory construction
- V Rising - Vampire survival action RPG
- CS2 - Counter-Strike 2 competitive gaming
- Garry’s Mod - Physics sandbox multiplayer
- Enshrouded, Soulmask, Unturned, FiveM, Ark SE, Conan Exiles, Core Keeper, Vintage Story, Don’t Starve Together, Sons of the Forest
Step 2: Configure Your Server
Once you’ve selected your game, you’ll need to configure your server settings. This is where you customize your server to match your needs:Key Configuration Options
Server Location- Choose the region closest to you and your players
- Available locations: Dallas (Central USA), Seattle (West USA), Ashburn (East USA), London (UK), Germany (EU), Amsterdam (EU)
- Lower latency = better gaming experience
- Player Slots: How many players can join simultaneously
- RAM: Memory allocation for your server (more RAM = better performance)
- CPU Priority: Higher priority for demanding games or large player counts
- Choose between different game versions (latest, stable, modded)
- Select server type (vanilla, modded, specific configurations)
- Some games offer multiple server software options
Payment & Checkout
We accept multiple payment methods for your convenience:- Credit/Debit Cards (powered by Stripe)
- PayPal for secure online payments
- SEPA for European bank transfers
- Cryptocurrency (powered by Coinbase Commerce)
Step 3: Access Your Game Panel
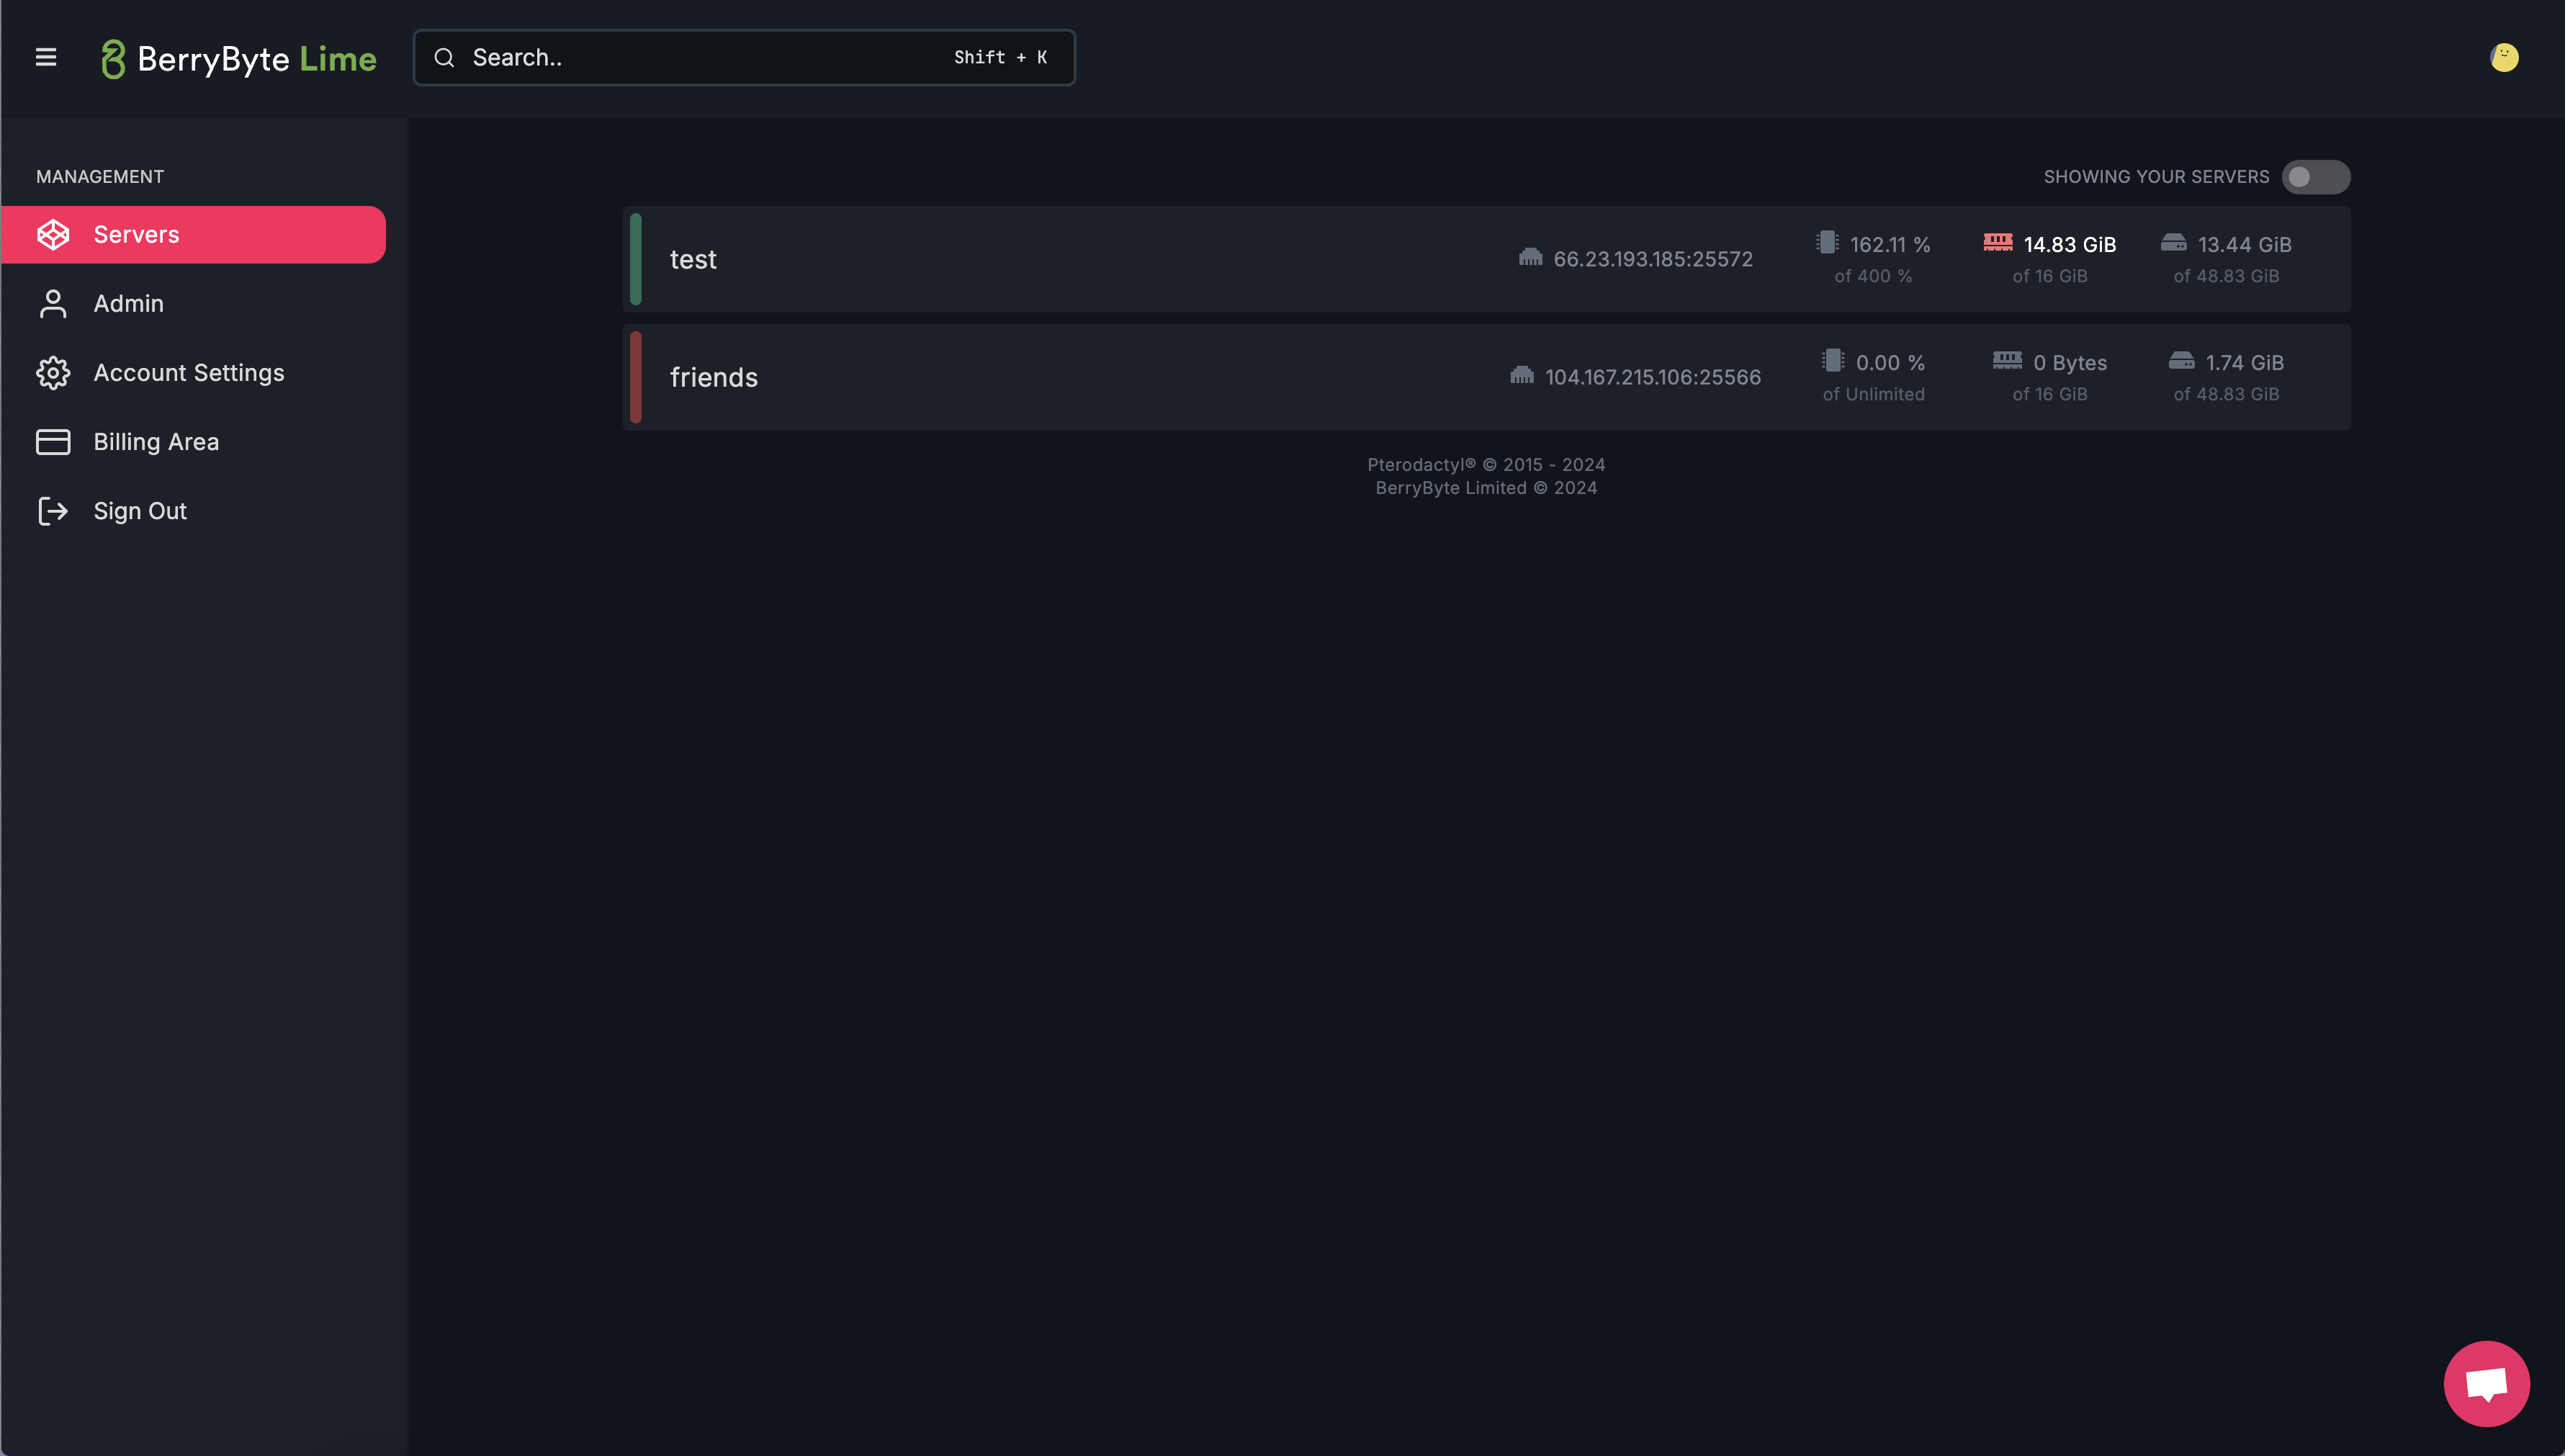
Getting Into Your Panel
- Check Your Email: Look for the “Account Created” email in your inbox
- Click the Login Link: This will take you directly to your game panel
- Save Your Credentials: Bookmark the panel URL for easy future access
Understanding Your Panel
Your game panel (powered by Lime) provides complete control over your server:- Server Status: Start, stop, and restart your server
- File Manager: Upload, edit, and manage server files
- Console: View server logs and execute commands
- Backups: Create and restore server backups
- Settings: Configure server parameters and options
Step 4: Start and Connect to Your Server
Now for the exciting part - getting your server online and connecting with friends!Starting Your Server
- Navigate to Your Server: Select your server from the panel dashboard
- Check Server Status: Look for the power status indicator
- Start the Server: If offline, click the Start button
- Wait for Startup: Most servers take 1-3 minutes to fully initialize
Connecting to Your Server
Connection methods vary by game, but generally fall into these categories: Direct IP Connection (Most Games)- Copy your server IP address from the panel
- Open your game client
- Look for “Direct Connect” or “Add Server” option
- Paste the IP address and connect
- Open your game’s server browser
- Search for your server name
- Look for servers in your selected region
- Join directly from the browser
Game-Specific Connection Guides
For detailed connection instructions for your specific game:- Minecraft Connection Guide
- Palworld Connection Guide
- V Rising Connection Guide
- Enshrouded Connection Guide
- Soulmask Connection Guide
Step 5: Customize and Optimize
Congratulations! Your server is now live and ready for players. Here are some next steps to enhance your server:Essential Server Management
Server Configuration- Adjust player limits and server settings
- Configure game rules and difficulty
- Set up server passwords for private play
- Monitor server resource usage
- Adjust RAM allocation if needed
- Configure automatic restarts for stability
- Install mods or plugins for enhanced gameplay
- Upload custom maps or worlds
- Set up regular backups to protect your progress
Advanced Features
Player Management- Set up admin permissions
- Configure player whitelists or blacklists
- Implement anti-cheat measures
- Create server rules and guidelines
- Set up Discord integration
- Plan events and activities
Getting Help
Our support team and community are here to help you succeed:- Live Chat: Available on xgamingserver.com
- Discord Community: Join our Discord server
- Email Support: support@xgamingserver.com
- Knowledge Base: Browse our comprehensive guides below
Related Guides
- Control Panel Overview - Understanding your server management interface
- Server Backups - Protect your server data
- Minecraft Server Setup - Game-specific connection guide
- Palworld Server Setup - Game-specific connection guide
- General Troubleshooting - Fix common issues
Frequently Asked Questions
How long does setup take?
How long does setup take?
They’re deployed instantly! Our automatic system will activate your server immediately after placing an order.
What hardware do you use?
What hardware do you use?
Our servers use the most powerful hardware on the market, solely using NVMe SSDs and a minimum of 1Gbps network port for every server.
- CPU: Ryzen 9 5950X, Intel i9-12900K, or similar
- NVMe SSDs (RAID 1)
- DDR4/DDR5 RAM
- 1Gbps-10Gbps Upload/Download Network Ports
What locations do you offer?
What locations do you offer?
Dallas, Texas (Central USA), Seattle, Washington (West USA), Ashburn, Virginia (East USA), London, United Kingdom (EU), Germany (EU), and Amsterdam (EU).
What payment methods do you accept?
What payment methods do you accept?
We support PayPal, Credit/Debit Card (powered by Stripe), SEPA (powered by Stripe), and Cryptocurrency (powered by Coinbase Commerce).
What's your refund policy?
What's your refund policy?
We offer a 48-hour refund policy upon placing your order. If you’re not happy with the service or you no longer need it, send us a message and we’ll give you a full refund. We request letting us know why so we can improve our offerings in the future.